Choosing the Right Lens for Professional Iris Photography
Capturing high-quality iris images is fundamentally a lens-driven discipline. While lighting and subject positioning matter, the optical system you choose determines how much iris detail you can actually resolve—and how efficiently your images can be processed later.
For professional iris photographers, selecting the right lens or objective is not just a technical decision, but a business one. It impacts throughput, consistency, and the level of post-processing required before an image is ready for delivery or enhancement in tools like Iricasso.
This guide breaks down the most commonly used optical systems for iris photography and explains which setups are best suited for different budgets and production goals.
Understanding Magnification and Reproduction Ratio
In iris photography, the most important optical concept is reproduction ratio—how large the subject appears on the camera sensor.
A true macro lens typically offers:
- 1:1 magnification (life-size reproduction on the sensor)
This level is generally considered the minimum requirement for detailed iris work. However, higher magnification systems are often used in professional environments where extreme detail capture is required for large-format prints or high-end compositing.
The higher the magnification, the more visible iris structures become—but also the more demanding the workflow becomes in terms of focus and stability.
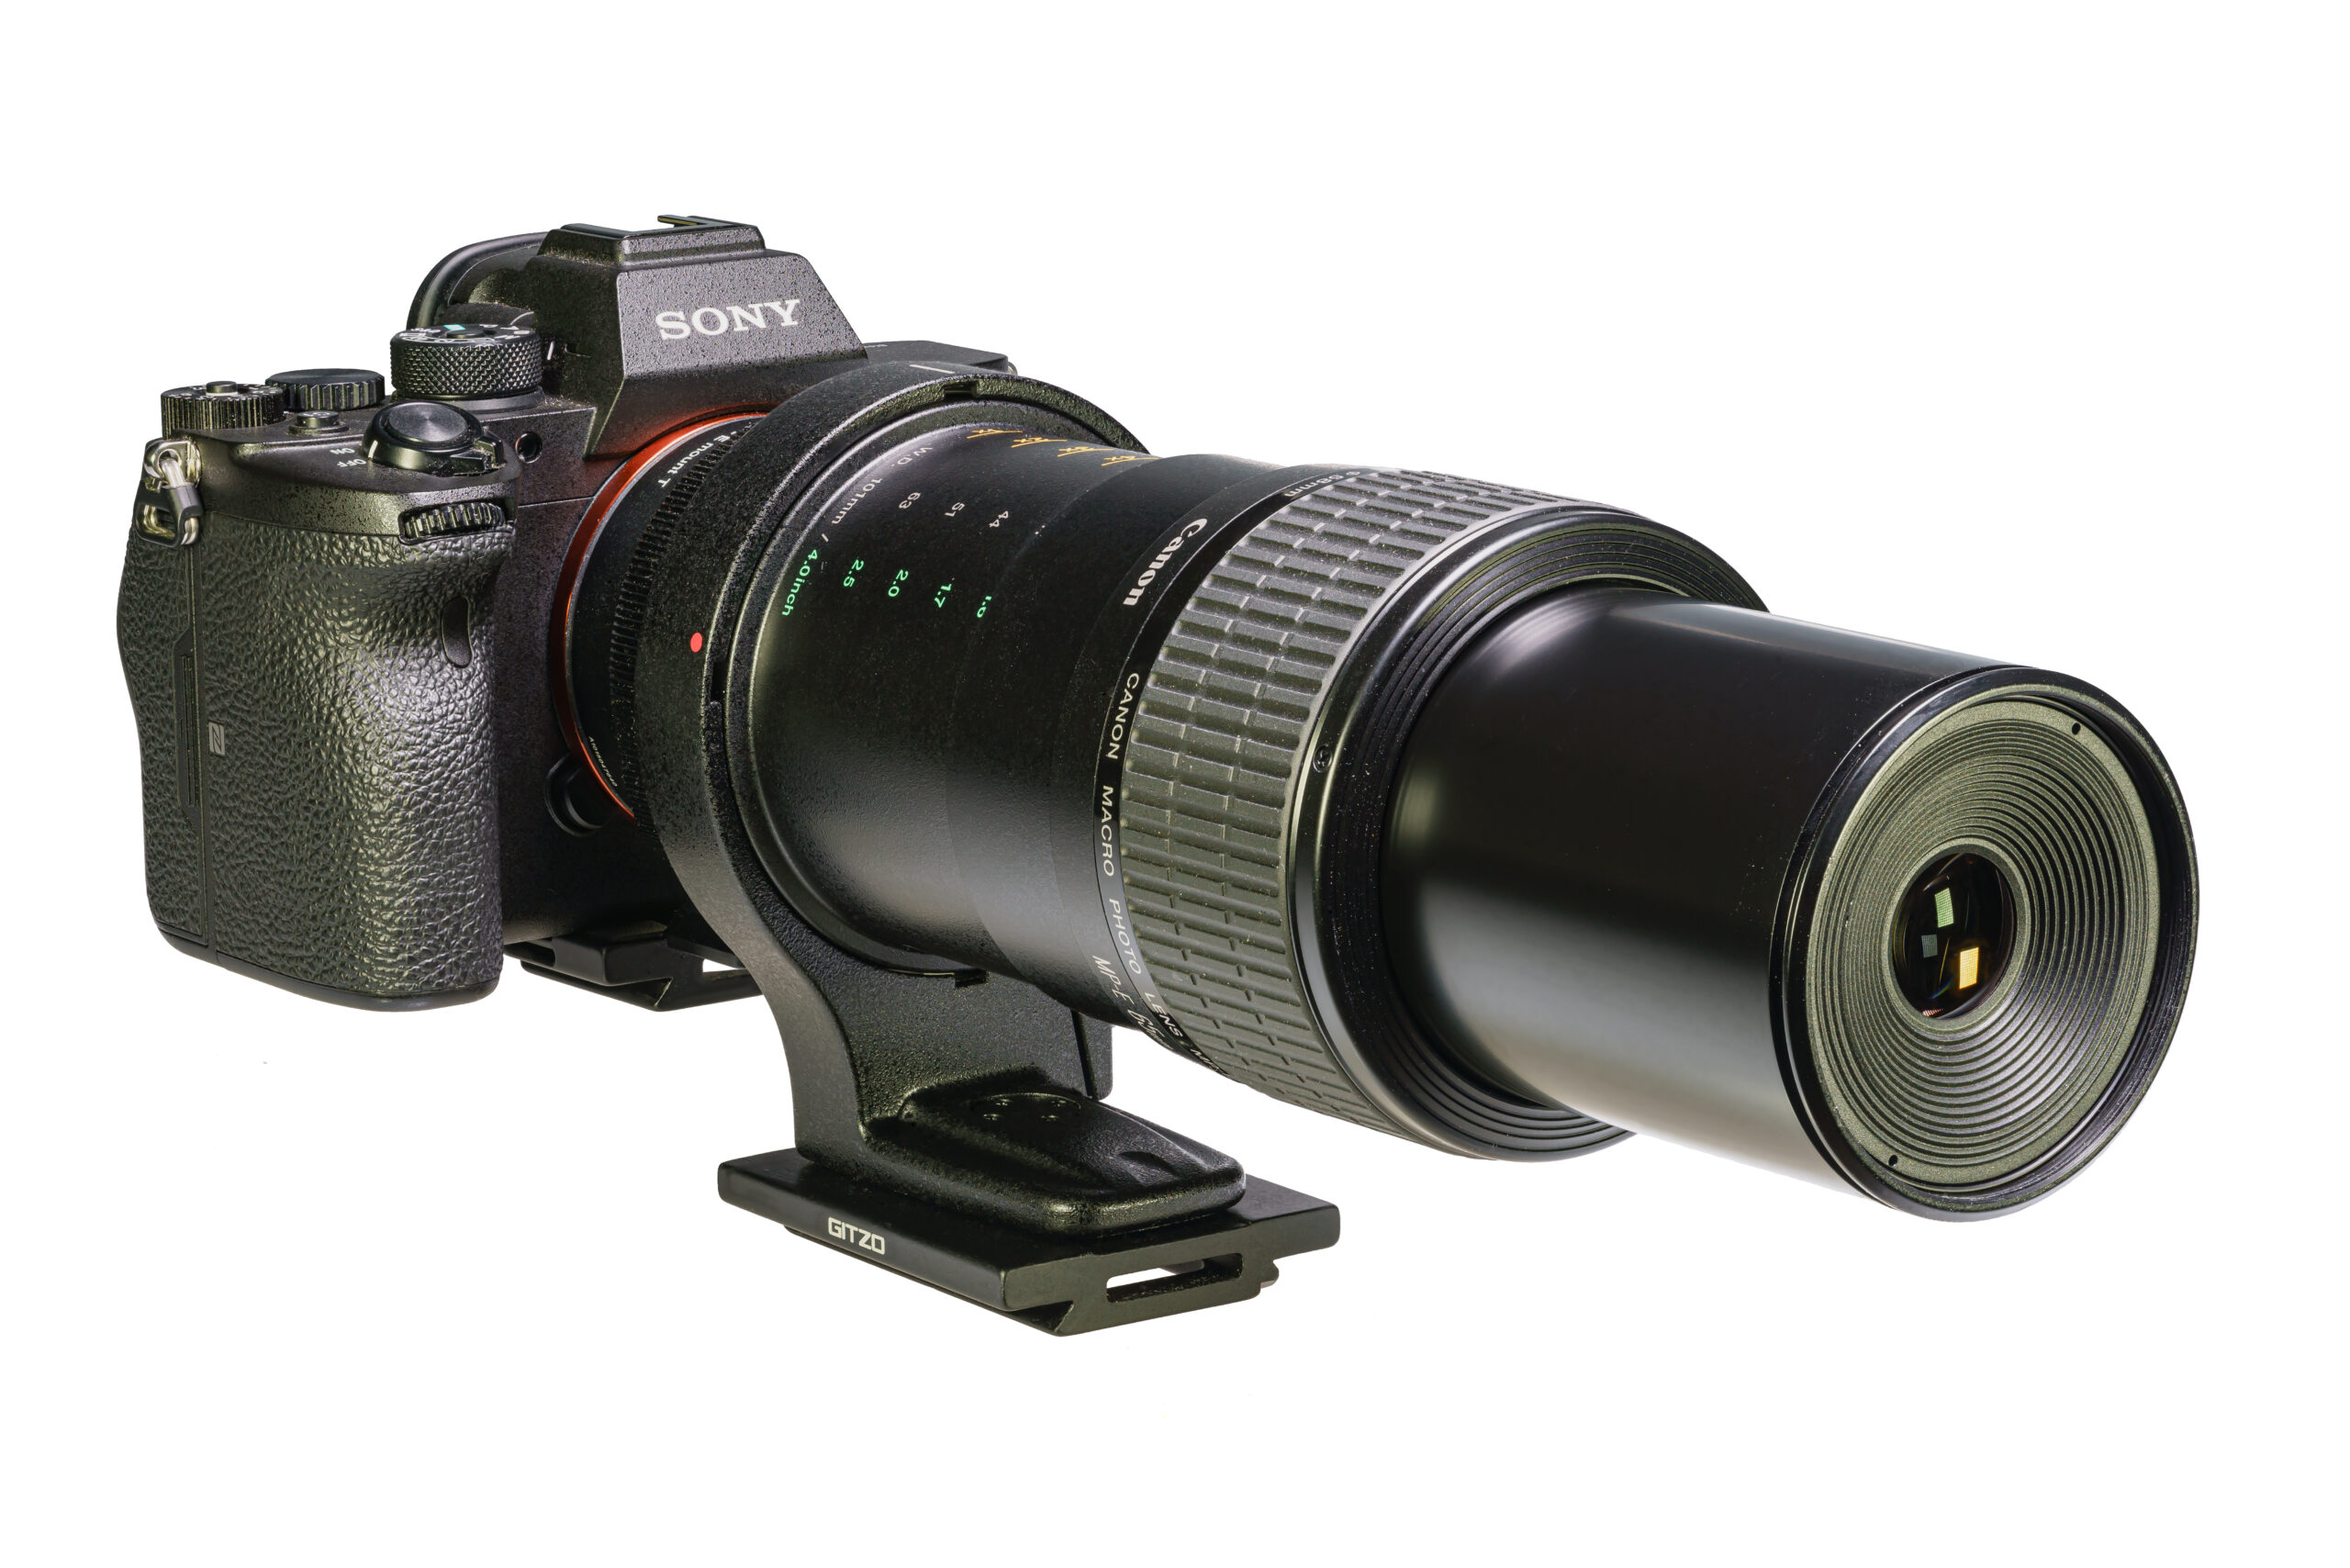
Standard Macro Lenses (1:1)
The Industry Baseline
A dedicated macro lens is the most common starting point for iris photography studios.
Typical focal lengths include:
- 60mm macro (entry-level systems)
- 90–105mm macro (industry standard)
- 150–200mm macro (advanced setups)
Advantages
- Excellent sharpness across the iris
- True 1:1 reproduction
- Relatively easy to operate
- Compatible with most DSLR and mirrorless systems
Limitations
- Requires very close working distance (especially shorter focal lengths)
- Sensitive to subject movement
- May still require moderate post-processing for reflections
Best Use Case
High-volume studios, retail iris kiosks, and general commercial photography setups.
The 90–105mm macro range is widely considered the sweet spot for balancing working distance, comfort, and image quality.
Telephoto Macro Lenses (150–200mm)
Higher Working Distance, Higher Precision
Longer macro lenses provide increased working distance between the camera and the subject.
Advantages
- More comfortable for subjects
- Easier lighting control
- Reduced distortion
- Better flexibility in studio environments
Limitations
- Larger and more expensive
- Heavier equipment requirements
- More sensitive to micro-vibrations
- Requires more stable mounting systems
Best Use Case
Professional studios prioritizing comfort, repeatability, and premium output quality.
These lenses are often used in higher-end iris photography businesses where workflow consistency is critical.
Extension Tubes and Close-Up Filters
Budget Expansion Tools
For photographers who already own standard lenses, extension tubes or close-up filters offer a lower-cost entry into macro photography.
Extension Tubes
These increase magnification by physically extending the distance between lens and sensor.
- Low cost
- No optical degradation
- Flexible combinations
However, they reduce focusing range and require careful calibration.
Close-Up Filters
These act like magnifying glasses attached to the lens.
- Very inexpensive
- Easy to use
- Portable
But they often introduce:
- Reduced sharpness
- Chromatic aberration
- Optical distortion
Best Use Case
Entry-level experimentation, training environments, or low-budget setups.
Not ideal for high-volume commercial iris photography.
Microscope Objectives (Extreme Macro Systems)
Ultra-Detailed Iris Capture
Some professional studios use microscope objectives adapted to camera systems to achieve extreme magnification levels beyond traditional macro photography.
Advantages
- Extremely high detail capture
- Exceptional iris fiber visibility
- Suitable for large-format or artistic outputs
Limitations
- Very shallow depth of field
- Extremely sensitive focus requirements
- Requires specialized adapters
- Slow workflow and low throughput
Best Use Case
High-end artistic iris photography, scientific imaging, or premium bespoke artwork production.
This is generally considered a niche, advanced workflow rather than a commercial high-volume solution.
Full-Frame vs APS-C Sensors
Sensor size affects perceived magnification and depth of field.
Full-Frame Sensors
- Better low-light performance
- Shallower depth of field
- More natural perspective
APS-C Sensors
- Effective crop factor increases magnification
- More forgiving depth of field
- Often more cost-effective
For iris photography, APS-C systems are often used in entry to mid-level studios due to their effective reach and reduced cost.
Budget-Based Recommendations
Entry-Level Setup
- APS-C camera body
- 60–100mm macro lens or extension tubes
- Basic LED lighting setup
Best for:
- Training
- Small-scale studios
- Initial business validation
Mid-Range Professional Setup
- Mirrorless or DSLR full-frame body
- 90–105mm macro lens
- Controlled lighting system
- Stable tripod or fixed mount
Best for:
- Commercial iris photography studios
- Retail kiosks
- Scalable workflows
This is the most common professional configuration.
High-End / Premium Setup
- Full-frame high-resolution camera
- 150–200mm macro lens or microscope objective system
- Precision lighting rigs
- Fixed studio mounting systems
- Tethered capture workflow
Best for:
- Luxury iris artwork providers
- High-volume production environments
- Premium client work
This tier offers the highest image quality but also demands strict workflow discipline.
The Reality of Professional Iris Photography
While it is possible to capture iris images with modest equipment, there is a clear relationship between investment and output quality.
Higher-end optics provide:
- Cleaner detail capture
- Reduced post-processing requirements
- More consistent results
- Faster production pipelines
However, expensive equipment alone does not guarantee success. Workflow consistency, lighting control, and subject positioning remain equally important.
The most successful studios combine reliable optical systems with disciplined capture processes.
Preparing Images for Post-Processing
Regardless of the optical system used, the goal should always be to produce:
- Sharp iris fiber detail
- Minimal reflections
- Even exposure
- Natural color rendering
These characteristics significantly reduce the time required in post-processing and improve automation performance in tools like Iricasso.
How Iricasso Fits Into the Workflow
Once a strong optical setup is in place, the next step is optimizing production efficiency.
Iricasso is designed to handle the repetitive and time-consuming parts of iris image enhancement, including:
- Cleaning reflection artifacts
- Enhancing fine iris texture
- Improving contrast and clarity
- Preparing images for print and display
The better the optical input, the more efficient and predictable the output becomes.
Final Thoughts
Lens choice is one of the most important decisions in building a professional iris photography business.
From budget extension setups to high-end microscope objectives, each system offers a different balance between cost, detail, and operational speed.
For most commercial studios, a high-quality 90–105mm macro lens represents the optimal balance. For premium applications, longer macro lenses or specialized optical systems can elevate results further.
Ultimately, the best system is the one that aligns with your business model—and the consistency of your workflow.
With the right optics in place, post-processing becomes significantly faster, and tools like Iricasso can deliver maximum value by transforming clean captures into polished, professional iris artwork.
Comments are closed